Here you can find information on the two vias normales al Aneto (normal routes), as well as advice on safety and equipment.

Glacier and Aneto peak seen from los Portillones. Photo: Chemary Carrera, Maspirineo
Aneto, a Dream
At 3,404m, Aneto is the highest mountain in the Pyrenees. Climbing to its summit is something any mountain enthusiast from the area dreams of doing at least once in a lifetime. The fame of Aneto also attracts many who are less experienced in mountain climbing but who also dream of accomplishing the challenge.
For this reason, it is, unfortunately, not uncommon to come across those in trouble on the ascent, due to poor preparation, lack of necessary equipment or with little experience or mountain know-how, which result in putting themselves at risk unnecessarily, if things get complicated.
This article aims has two aims:
- Describe the two normal Aneto ascent routes step by step, with details on the terrain, times, etc.
- Explain the difficulties, physical demands and safety issues related to both ascents.
The aim is to make it very clear to anyone planning to climb Aneto, and especially to those with little mountaineering experience, what they will face, so that they can evaluate if they are prepared.
- It’s important to get into good physical shape for this climb. Not only because it will be more enjoyable, but also because extreme fatigue increases the chances of injury or an accident on complex terrain.
- If you are inexperienced in safety techniques and technical skills, it is wise to consider hiring a qualified mountain guide.
Guides not only show you the technical skills required for climbing the route, such as ice axe self-arrest, but provide a wealth of information on the mountain and transmit their passion. They also guarantee your safety on the ascent and descent and take all safety related decisions regarding the route, weather, itinerary and any other unforeseen events.
This article refers to the two classic routes of Aneto. There are also many other climbing routes to the summits of the massif, but these are for highly experienced, technical climbers and mountaineers.
Aneto Safely
The original article was written by High Mountain Guide, Chemary Carrera, who owns the Maspirineo ski and guide company.
Chemary was born and raised in Benasque valley, and his experience and expertise of these mountains is as deep as his passion.

Chemary Carrera, at the summit of Aneto. Photo: Maspirineo
In addition to guiding many people each year on Aneto and surrounding mountains, he also collaborates with the Montañas Seguras and Aneto Seguro campaigns (Safe Mountains, Safe Aneto), giving talks to those who wish to tackle the ascent of the highest peak in the Pyrenees.
This article includes safety advice to help you get the most from an unforgettable experience.
Key Points
We will begin by explaining the different access points to the route.
After looking at the ascent-descent times, we will address safety issues.
Finally, we will analyse the routes in detail, with their difficulties and sections and talk about the essential equipment needed for the ascent.
GUIDE TO THE BESURTA/RENCLUSA AND BALLIBIERNA ROUTES
There is no mountain hut on the south face ascent of Aneto and there is only one approach route.
The north face route takes you to the Renclusa hut (Refugio de la Renclusa), where you can stay the night. .

The historical Refugio de la Renclusa. Photo: R. de la Renclusa
If you stay in the Renclusa hut, you save 50 minutes on the ascent and can set off to the summit earlier the next day. The mountain bus also saves time on the approach.
There is a limited number of beds in the hut and for this reason we also include the Besurta route, but it is a good idea to check if there is room in the hut the day before, just in case, as this allows you to set of a day in advance.
The Renclusa hut is over a hundred years old and is steeped in Pyrenean history, so spending a night there is almost an unmissable ritual for anyone wishing to fully experience Aneto.
Access
From July 1 to September 15, the access trails to the base of Aneto on both the north and south sides are closed to traffic. During this time there is a mountain bus service regulated by the Benasque council. Complete information about prices and times are available here.
As you will see, due to the long climb, catching the bus at the right time is critical for the ascent.
1. North Face Approach. Bus to Besurta
The first mountain bus leaves the village of Benasque at 4:30am, and this is the one you need to take. The second one is not until 7:30am, which is too late to make the ascent safely.

Trail to Besurta. Photo: Barrabes
Another option is to drive up to the Hospital de Benasque (now a hotel) car park at the entrance of the valley, just before the barrier that blocks access to the trail. From there, the first mountain bus from Benasque passes at 5:00am, and again, this is the one to catch. The following buses from this car park to Besurta run every 35 minutes; if you are unable to take the 5 am bus, we recommend taking one no later than 6:10am.
On the way back, the last 3 buses back to Benasque leave Besurta at 17:00, 19:00 and 21:00. From Besurta to the Hospital de Benasque there is a bus every 35 minutes from 8:00am to 20:30pm.
2. South Face Approach. Bus to Ballibierna
Transport to access the south face Aneto route is more complex, because the last bus down from the Coronas fishing cabin is at 18:30pm. If you miss it, you will have to walk the 12 kilometre trail to Senarta, and then a few kilometres along the road to Benasque.

Starting point for beginning the ascent, with Ballibierna peak in the background. Photo: Barrabes
To ensure you keep to schedule and arrive in time for the 18:30 bus, you need to take the 5am bus from Benasque, that passes through Senarta at 5:15am, and arrives at the base of the Aneto at 6am.
If you miss the last bus down and are able to find a spot with coverage you can phone one of the Benasque mountain taxis. They have permission to access the trail to pick you up.
Aneto Ascent Times. Points of Reference
Catching the first bus is important to ensure you have enough time for the ascent as well as for your safety, which we will mention later. The ascent and descent, normally takes between 10-12 hours, but it can take longer.
These times are calculated according to the MIDE system. You can see further details at the Montañas Seguras website, endorsed by the Aragonese Mountain Federation, Spanish Mountain Federation, Civil Protection and other organizations.
It is used in guidebooks on the area and informative signs at the start of treks, etc.
The MIDE system assesses the difficulty of a route based on the average mountaineer, who is in good shape and with enough experience to complete the route. It assesses the following points of a route:
- Times
- Severity of the natural environment
- Orientation
- Difficulty
- Level of physical fitness required
- Elevation gain
- Elevation loss
- Horizontal distance
- Presence of snow
- Type of route
It is an extraordinary system because it allows rigorous comparison of one route to another. This means you can be sure that the times provided below are taken from the vast majority of average, fit and experienced mountaineers.
 in the middle to the right of the peak. Photo: Barrabes")
The north face of Aneto with the Collado de Coronas in the middle to the right of the peak. Photo: Barrabes
1. North Face, Reference Points
- Besurta 0 hours
- Besurta – Renclusa hut: 50 minutes
- Renclusa hut - Portillón Inferior: 1:45 hours
- Portillón Inferior - Portillón Superior: 30 minutes
- Portillón Superior – Collado de Coronas: 1:45 hours
- Collado de Coronas – fore summit of Aneto: 40 minutes
- Puente de Mahoma – summit - Puente de Mahoma: 20 minutes
- Fore summit of Aneto- Besurta: 3:40-4 hours.
All this adds up to about 9 hours, excluding stop times. If you add the stop at the summit, stops for food and drink, to take photos, have a rest, prepare gear on the glacier, etc., this time can easily go up to 10-12 hours.

South Face of Aneto. Coronas col is in the middle, to the left of the peak. Photo: Barrabes
2. South Face, Reference Points
- Fishing cabin: 0 hours
- Ibonet de Coronas: 50 minutes
- Ibonet- Ibón Baixo de Coronas: 1:10 hours
- Ibón Baixo- Ibón Alto de Coronas: 30 minutes
- Ibón Alto de Coronas- Collado de Coronas: 35 minutes
- From here we join the north face route to the summit: 1 hour
- Descent: 3:30-3:45 hours
Excluding stops, it takes approx. 8:30-9 hours. Including stops to eat, hydrate, see the summit, take photos, prepare for the glacier, etc. it takes some 10-11 hours.
For this reason it is so important to catch the first bus: if not, you won’t get back in time for the return bus. And after the long day, it is very tiring having to walk the 12 kilometre trail back.
Safety
1. A Long Day
As you can see, climbing the Aneto on either face takes a long, full day. That is why it is so important to keep these estimated times in mind: if you find you are taking much longer, the wisest thing is to consider turning back.
We have already said that the MIDE method bases its assessment on the average mountaineer, but it is easy to go over the estimated times, if you are tired or not used to high mountaineering, etc. For this reason it is essential to start early: otherwise, in the case of any unforeseen event, there will be little daylight left to react or organise a rescue, for example.
As a rule, if you keep to the estimated times on the ascent, you are likely to do the same on the descent, but if you take longer on the ascent, the descent can become eternal, with the accumulation of fatigue, resulting in a 14-15 hour day, with all that this entails. In this case, starting at 6 a.m. would mean finishing at 8p.m. which means any slip-up or incident would end your chances of finishing in daylight... and that's if you set off early. Leaving later increases the chances of encountering difficulties.
So, a significant delay on each section means it may be time to turn back, as this is probably an indication that either your level of fitness or technical skills are not adequate or your body is just not responding well on that particular day.

An early start in the dark. Dawn will break on the ascent. Photo: Chemary Carrera
Pushing yourself too hard in such a situation can lead to problems at the top and exhaustion. And as we have already said, the margin of time for dealing with any unforeseen event is reduced by starting late.
You can always change your goal: if you are advancing slowly, you can decide, for example, to reach just the portillón: this will give you a splendid view of Aneto, and is a good way of gaining experience on this type of terrain.
Aneto has stood for millions of years, and is not expected to disappear anytime soon. So, if the cards are against you on the day of your ascent, turn back and return another time.
2. The Importance of a Group
A group has to function as a team. Even if you are doing well, someone else in the group may not. A group should move together, at the pace of the weakest and never leave anyone to wait somewhere for your return. That is dangerous in the high mountains.

A mountain team always looks out for each other. Photo: Maspirineo
A mountain group sticks together on both the ascent and descent and all decisions are made with respect to the weakest member.
3. Experience, Technical Skills and Physical Fitness
Such an ascent should never be attempted without having the appropriate mountain experience, physical fitness, and technical skills.
You may be in good shape, but do not have the level of experience required to tackle such an ascent. If you are unclear, it is advisable to spend a few days beforehand climbing easier, lower mountains in the area. Something like 700-800 meters of elevation gain will allow you to assess your skills and give you confidence for the mountain ascent.
If this is not possible, another option is to hire a guide, who will advise you on the how to prepare for the ascent and help get you into shape.
4. Hire a Guide!!
Answer the following questions honestly:
- I am ready to climb (and descend) a 1,500m elevation gain
- I am used to walking on mountainous terrain
- I am used to taking decisions in the high mountains: weather, route, when to turn back, assessing risk...
- I have the skills and know how to use the required equipment.
If the first answer is no, and you are not in the right physical shape to face a day climbing Aneto, you first need to train.
If you answers no to all questions, we strongly suggest you hire a certified guide!!

A guide ensures your safety and makes the necessary decisions. Photo: Maspirineo
A guide will teach you mountaineering skills, such as crampon techniques or self-arrest and take care of all safety decisions regarding the route, weather, itinerary and any unforeseen events. In the valley there are a number of excellent, qualified mountain guide companies to choose from.
5. The Weather
In the mountains, one of the most important issues is "the weather". And on the day of the ascent it is vital.
Bad weather in the mountains can lead to serious complications, even in summer. If, for example, you are on a mountain ridge on a sunny day in July or August and the wind blows from the north, it can quickly feel like 0ºC. Bear in mind that even in the middle of August, at 3,000m, a rainstorm, snow or sleet are not at all uncommon.

'24th June, 30cm of fresh snow on Aneto. Photo: Chemary Carrera, Maspirineo
When you are in the high mountains, the clouds are often at your level. If you find yourself inside a cloud, it is normal to have very little visibility.

Bad weather reduces visibility in the mountains. Photo: Maspirineo
To avoid problems, it is important to plan ahead. Always consult the weather forecast. The most reliable forecast is on the day before. Don’t rely on general forecasts, but look for mountain forecasts and for the specific area you plan to go to. Different apps, such as meteoblue, are a good choice. The AEMET (Spanish Meteorological Agency) forecast is also key.
You can normally, also get detailed weather updates in the village and mountain huts.
The more experienced can make the right decision on summit day, if they are able to interpret the weather signs and see if a storm is due early, etc.
Summer weather in the Pyrenees is renowned for its thunderstorms. They build up throughout the day, as the heat accumulates in the valleys and rises into the surrounding mountains. You can usually detect the formation of the storm and determine if you need to turn back.
Storms usually start to form in the mid-afternoon and so this is yet another important reason for setting off early.
NORMAL ASCENT AND DESCENT ROUTES OF ANETO
Remember, you are in high mountain territory, which means there are no roads or signs. There are few reference points, except for small cairns.
Added difficulties in the high mountains should be expected. From scrambling and crossing ice and snow glaciers to walking on steep or exposed terrain and scree.
For this reason, expect to move more slowly than if walking on a road or trail.
Since there is no path or signposts, you will have to use your experience to find the best path.
1. Classic North Face Aneto Route
Besurta - Portillón Inferior
On the north face route, the path disappears a few minutes after leaving the Renclusa hut, and you will need to pick your way through rocky terrain on the ascent to the Portillón inferior. Depending on your agility, this section will be easier for some than others.

Rocky terrain between the Portillón inferior and superior. Photo: Maspirineo
Portillón Inferior - Portillón Superior
The terrain is still rocky from the Portillón inferior to the Portillón superior, but it is a more comfortable to walk on as the rocks are larger and more stable. Once at the Portillón superior, you can view the glacier and path to the summit.
The first sight of the upper part of the mountain is an exciting moment as it is not visible from lower down.

First view of Aneto summit and glacier from Portillón. Photo: Maspirineo
Portillón Superior - Glacier
The path from the Portillón superior to the glacier is normally without snow, unless it is the beginning of the summer season, or has been a very snowy winter. Snow on the path actually makes progression easier.

Snow covered path on approach from Portillón. Photo: Maspirineo
When there is no snow on the path, extreme caution must be taken. Until some years ago, this rocky area was covered in glacial deposits, caused by the retreating glacier and this has left the whole area of the moraine unstable, with moving stones and rocks.

Exposed moraine on approach to glacier. Photo: Maspirineo
Aneto Glacier
Once you reach the glacier you will find either of these conditions:
- 1. It is covered with snow. This is normal until well into the season, and sometimes lasts throughout, until the following winter.
- 2. The glacier ice is exposed. It may be the end of the season or, a year with little snowfall.
The first case is easier as the crampons grip well in the snow and give greater protection.

Aneto glacier with snow. Photo: Maspirineo
The second case, with old, dark grey ice, is worse, as the crampons barely dig in more than a millimeter, and great care and good crampon skills are required in order to stay safe.

Aneto glacier with dark ice. Photo: Maspirineo
On snow, you can position your feet horizontally, but on glacier ice, your foot has to adapt to the terrain, and this requires skill to avoid a fall and ankle problems.
You should carry your ice-axe in one hand and the trekking pole in the other, for enhanced safety. This means you need to know how to self-arrest and other ice-axe skills.
In this section you need to look out for falling rocks. You will notice that the glacier is dotted with stones that have fallen from the ridges above. If the day is hot, or it is late in the day, the permafrost and ice that hold them together begins to melt, which can lead to dangerous rockfall from the ridges, or from the higher slopes of the glacier.

Numerous fallen rocks on the glacier, from the ridges. Photo: Maspirineo
About 15 minutes before reaching the summit, the glacier ends and, if there is no snow, your crampons can be removed. Be careful: although it is not a complicated area, you are close to 3,400m, and fatigue and altitude may begin to affect your performance.

Nearly there! On the right is the north face and on the left, the south face of Aneto. Photo: Maspirineo
Puente de Mahoma - Summit
The Puente de Mahoma is a ridge of about 35 meters, with low technical difficulty (only grade I-II) and with good holds, but it is very exposed and there is a steep fall on either side, which is quite scary for some. You need to take it slow and look for hand and foot holds to progress safely, in comfort and with confidence.

Puente de Mahoma. Photo: Maspirineo

On the Puente de Mahoma. Photo: Maspirineo
Note: you would not be the first to find the void of this section imposing or feel fatigue from the altitude and long ascent. In this case, we highly recommend ending the ascent before the Puente de Mahoma. The difference in altitude with respect to the summit is only 7 or 8 meters, which is not worth it if you are not in the right condition, either physically or mentally. Especially as you have to pass it both on the way up and back down.
2. Aneto South Face Route
To Ibonet de Coronas
The beginning of the ascent from the Refugio de Pescadores is easier than the north face ascent. In fact, the path up to the Ibonet de Coronas winds through a black pine forest and rocks for 50 minutes.
Ibonet - Ibón Baixo de Coronas – Ibón Alto de Coronas – Collado de Coronas
From the ibón Baixo you enter unmarked and undefined territory. Once you reach the high lake you reach the very steep moraine, with scree and sand that can be quite slippery.

Ibón Alto de Coronas. At the top right is the Collado de Coronas. Photo: Barrabes
It is normal to have to use your crampons if you come across sections of snow on the way up to the final climb to the Coronas pass.
The final climb is through a wide chimney of large blocks. It is not difficult, but you will need to pay attention placing your hands and feet.

The south face ascent seen from the top. Below is the Ibón Alto de Coronas. Photo: Maspirineo
Collado de Coronas – Summit
At the Collado de Coronas you join the north face route. Crampons will be necessary on the same section.
The remaining part of the glacier lasts about 30 minutes and is the steepest.

The long-awaited moment: the summit of Aneto. Photo: Maspirineo
Essential Equipment for Climbing Aneto Safely
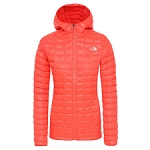
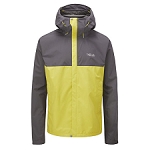
1. Warm, Waterproof Clothing.
Always ensure this is included in your pack – even on the hottest day of summer.
On high mountain ascents, the temperature can change very quickly, due to north winds, a shower or an oncoming storm. We insist: on a hot, sunny day if the wind blows in from the north, the thermal sensation can quickly drop to around 0ºC.
Always pack a waterproof-breathable jacket (not insulated) and a mid layer (fleece, synthetic or down) for warmth. In summer, choose the lighter models, to reduce weight in your pack. If possible, pack waterproof pants. Other essentials are spare socks, a sun hat, cap or neck gaiter, a long-sleeved shirt and trousers. Gloves are also essential: not only for bad weather, but for walking on snow and using an ice axe.
You can change into a T-shirt once you descend from the highest and most exposed areas.
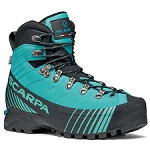
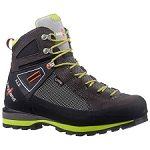
2. Footwear
We recommend choosing semi-rigid boots.
This type of boot is ideal for spring to autumn use in the high Pyrenees as the level of rigidity makes them compatible with crampons. A flexible boot is not advisable as it can easily move around in the crampons and make them come loose.
Semi-rigid boots also provide stability to the sole on uneven terrain and of course, they fully protect the foot.
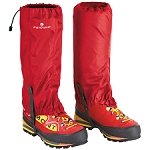
Trainers should be avoided and if there is a lot of snow, gaiters are recommended.
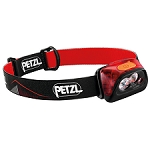
3. Headlamp
An early start usually means setting off in the dark. On the longest days, at the end of June, dawn breaks at approx 5am, but this only lasts a few weeks, so it is important to pack a headlamp for visibility on the first hour or so of walking.
A headlamp is also essential for your safety, in case you are still on the mountain after nightfall or need to signal your position to a rescue team, etc.
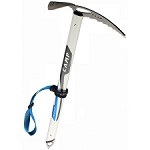
4. Ice Axe
An ice axe provides support and stability, and is used for self-arrest in the event of a fall on ice or snow. The Aneto ascent requires a lightweight classic ice axe, which is long enough for use as a walking stick. More technical ice axes are not suitable for these kinds of ascents.
You need to have practised using an ice axe before the ascent, of course. Learning ice axe skills is essential before you adventure into the high mountains. If you are inexperienced, talk to a guide on how to train for the ascent.
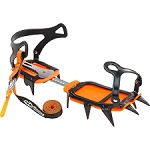
5. Crampons
Absolutely essential. One of the most dangerous questions you hear in forums and groups is "How are the conditions on Aneto, Monte Perdido, etc.? Do you need crampons?
Choose lightweight walking crampons. They are the best for glacier walking and better than the more technical models. Semi-rigid boots are compatible with strap or semi-automatic attachment systems.
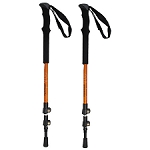
6. Poles
One or two?
One is usually enough on the ascent and you’ll hold your ice axe in the other hand, on the glacier
On the way down, two poles are useful for taking off the load from your knees and for increased balance and safety. Bear in mind that the gear, food and water in your backpack will weigh about 8 kilos, and fatigue usually sets in after the long ascent.
7. Food and Water
Spending 10 to 12 hours on a mountain uses up a lot of energy and it is important to replenish regularly. Ensure you pack enough snacks, bars or gels just in case you have an energy crash...it's up to you to decide.
Always carry a little more than you expect to need, just in case.
Water can sometimes be collected from the glacier, snowdrifts or streams, but at such a high altitude the water contains very few minerals, so it is a good idea to add mineral salts in the form of powder, drops or tablets.
Here you can read how to purify water outdoors.
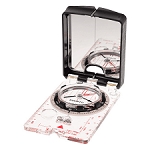
8. Orientation
Another essential item is a map and compass and knowing how to use them. This not only helps you keep to the route, but once you reach the summit, it helps you identify the countless mountains surrounding you. .
GPS. Check the battery power and bear in mind that batteries run out more quickly in cold temperatures.
9. Personal Protection and Safety Equipment
First-aid: a basic kit. For blisters, small cuts, a bandage, pain relief…
Sunglasses and sunscreen. The intensity of sun rays is much greater because of the altitude and also due to the reflection of the snow and ice. Sun cream should be applied at least every two hours.
Always carry a survival blanket or two: they take up very little space in your pack and are very lightweight. In case of an accident, they help preserve body heat (or, if you turn it over, it protects from the heat and sun).
A mobile phone. It may be needed in case of an emergency. Remember that the Spanish emergency number 112 functions with any mobile network, so if there is minimum coverage with another provider, even if you are in another country, you can call this number.
It is, of course, to have enough battery power: be careful, if you use your phone as a GPS, camera, etc. You can always carry a spare charger, but this adds weight, or you can just pack it for emergencies and forget about its other uses for a day and enjoy the mountains.
10. A Useful Tip
Plastic cable ties!!
This is a good trick that can get you out of many a tight spot: if something breaks, like your crampon plate or strap, or even your boot or your backpack strap, a couple of cable ties will usually work as a temporary solution. In the mountains, it’s always advisable to carry a few in your pack.
On-line store: www.barrabes.com/en-gb/


Leave a comment
Be the first to comment on this article.